

Commemorative Needlepoint Ornaments
These ornaments have been designed to honor the life of a loved one, friend, or pet.
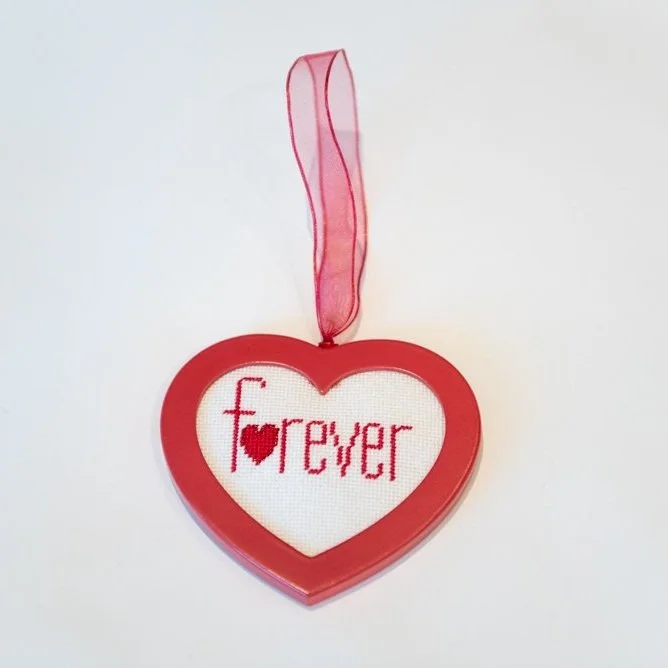
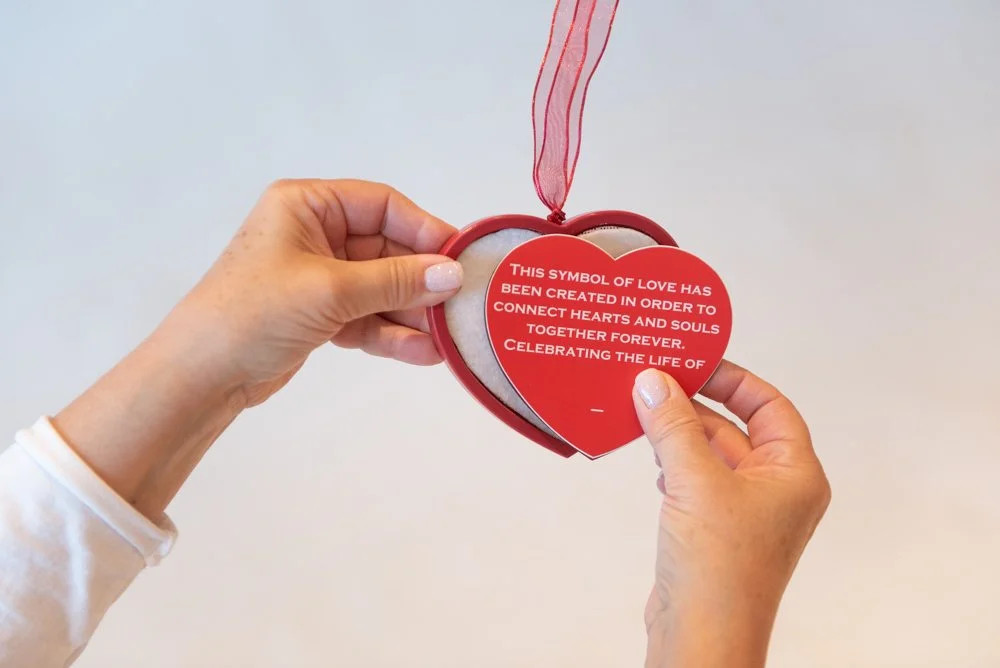
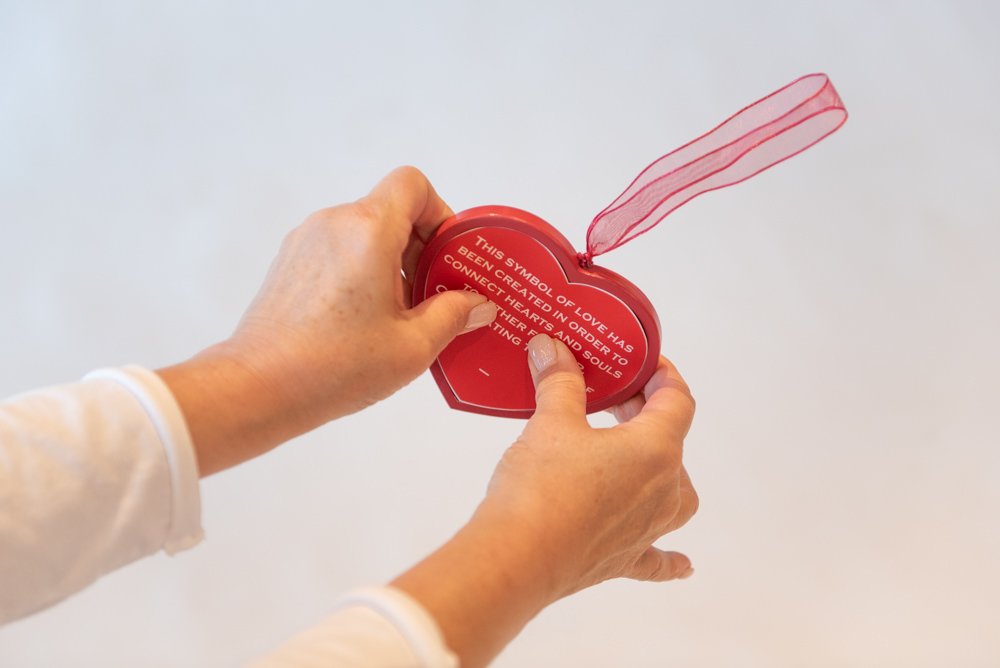
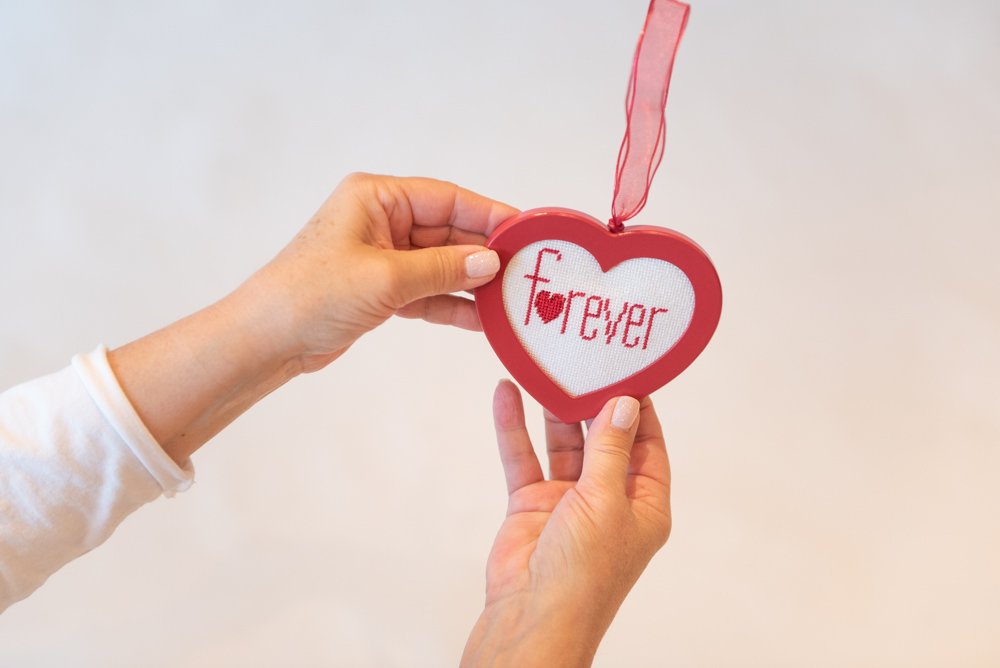
Sentiment included with “Forever” ornament: “This symbol of love has been created to join hearts and souls together forever. Celebrating the life of….” You will be able to customize the back of the ornament using a Sharpie marker with the individual’s name, along with the year they were born and the year they died.
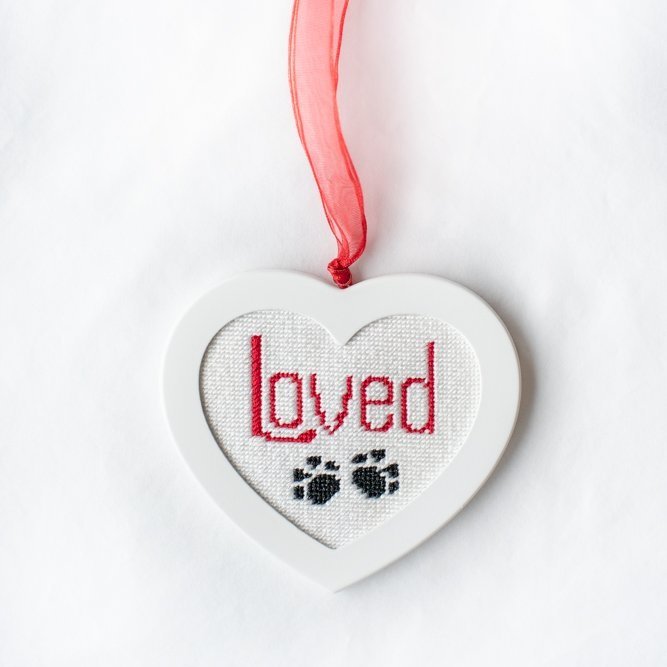
Sentiment included with “Loved” ornament: “Always in our hearts”. You will be able to customize the back of the ornament using a Sharpie marker with the pet’s name.
The kits include all materials needed to make and finish the ornament as well as packaging to gift the completed item: hand-painted canvas, needle, fibers, wooden ornament with hanger and instructions for finishing.
Commemorative Needlepoint Instructions
Thank you for purchasing this kit, creating and sharing a special gift of remembrance!
To begin, we recommend that you stitch the background first, whether in basketweave or another decorative stitch. We have recommended a few suggestions below for you to pick from.
As you will be working with white embroidery floss, make sure your hands are clean! 😊
It is recommended that you use four (4) strands of DMC floss for basketweave. If you are using an open stitch or carrying your thread farther, you may wish to add another strand in your needle for coverage.
Then, finish stitching the letters and other parts of the design. Make sure to keep ends short so as not to draw up the ends of other colors where they don’t belong.
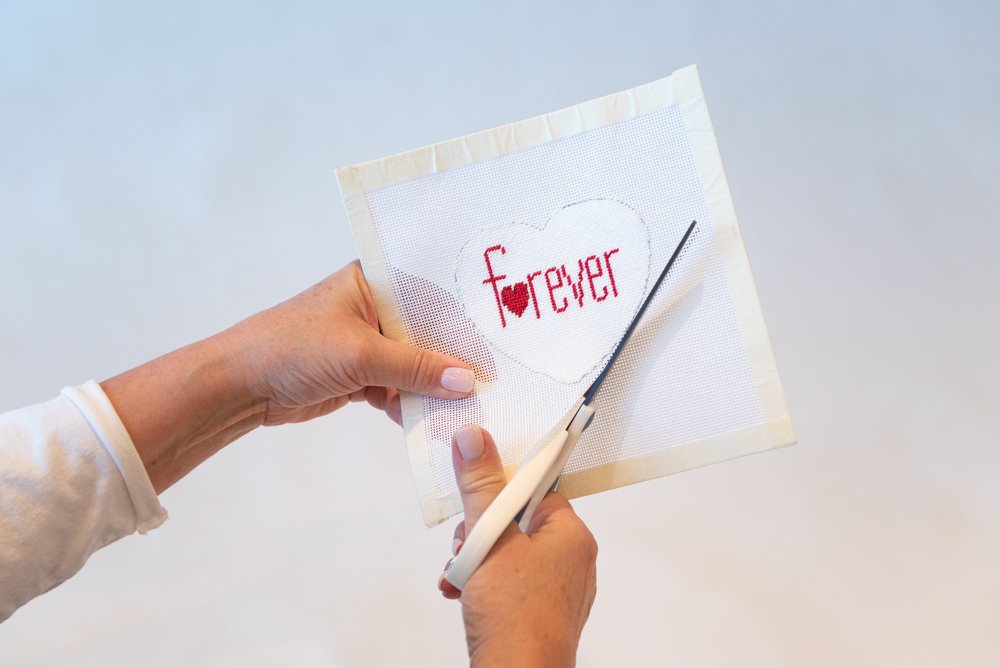
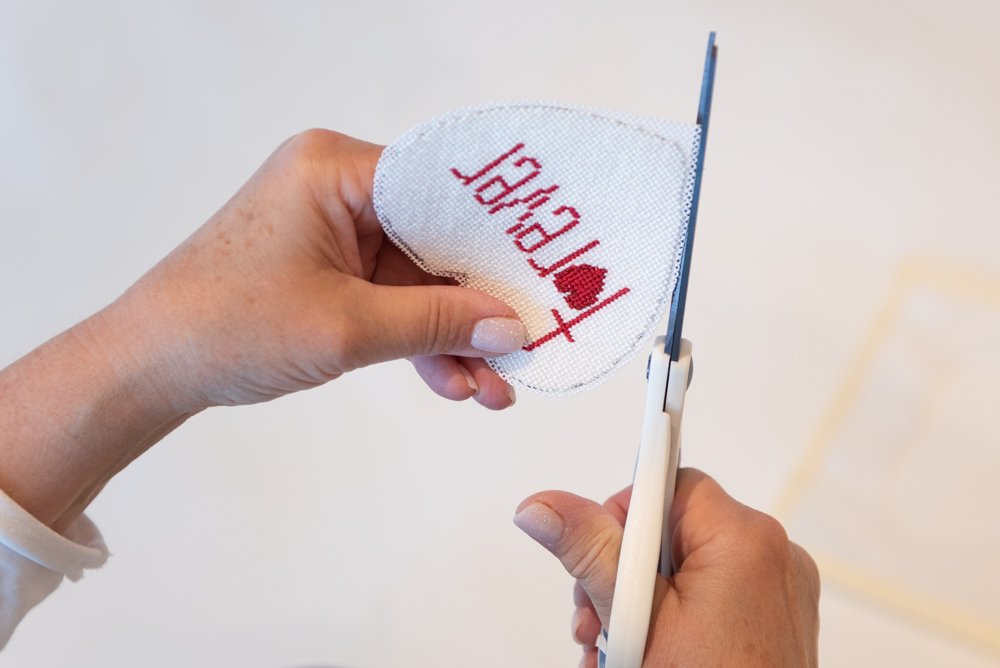
Stitch ONLY to the outline — do not cover the outline or go beyond. This will ensure that you can cut the canvas close enough for finishing inside of the frame/ornament.
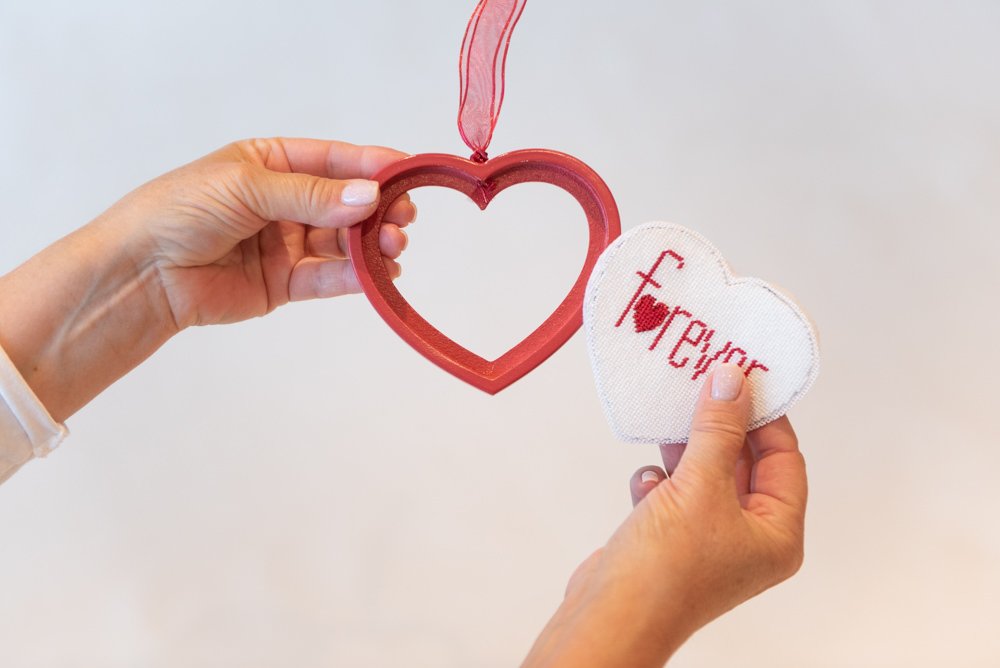
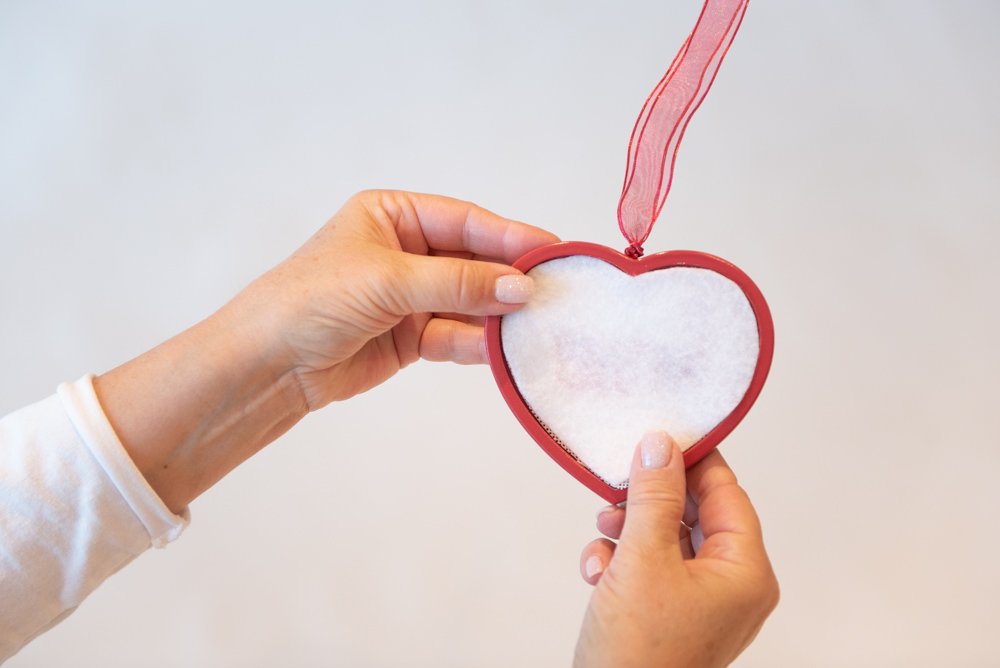
Once complete, cut around the heart shape, one row past the outline around the entire edge. Place needlepoint design inside of the frame (facing outwards). Place white craft felt heart behind the needlepoint design for padding. Finally, replace the back of the ornament (with sticker) into the back of the frame and gently push forward until it snaps into place.
Stitch Suggestions for Background:
TOOLS: Scissors

Canvas Design
INSTRUCTIONS FOR FINISHING:
Complete stitching the canvas inside outline of canvas — no waste row needed.
Trim the canvas in the shape of the heart with one (1) row of raw canvas around the entire heart.
Remove the back of the ornament from the frame. Personalize the sticker by using a Sharpie maker and set aside for the ink to dry for a few minutes before reinserting.
Hold the finished needlepoint design and the craft felt heart together; fit this into the front of the frame with the design facing outward.
Carefully place the back of the ornament (with sticker facing you) and press the back into place gently/firmly.
Place the completed ornament into the additional clear bag provided for gifting. Seal with the second sticker (smaller) provided.

Share Your Story
Follow HeartForward Project on social media, and use the hashtags #heartforwardproject and #forgood to share your work and stories with us!